Saturday, May 5, 2012

HIRED!!

Thankfully, after only a month of having a working permit, Simon is now officially a working man! It's tough to say what has been the most exciting part of our lives recently: Simon getting his working permit after MONTHS of waiting, or him getting a job after not much waiting at all!  Either way, we are truly blessed and God is faithful!    

So, the details:

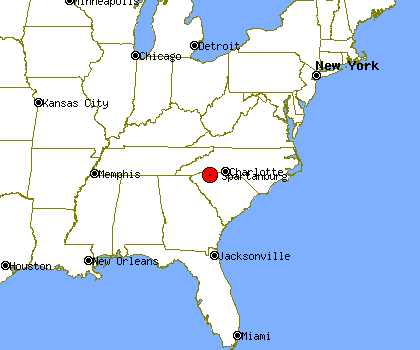
WHERE?  Spartanburg, South Carolina

WHEN? May 14th!!

WHO? Consultex Systems

WHAT? Mechanical Design Engineer


As you may have guessed, we are STOKED!! It all happened over the course of just a couple of days from the applying to the hiring so it was a little unexpected, which made it all the more exciting.

All of this is changing our life immediately.  You may be aware that this is being posted on May 5th.  Therefore, May 14th is JUST around the corner and we currently live in Texas.... (Which is NOT close to South Carolina).


So, we began frantically searching for reasonably priced apartments close to Simon's new job and trying to plan how we will move our belongings from our storage unit... in Arkansas.

We, more or less, have a game plan now.  Simon will be traveling to Little Rock and, with the help of my dad, loading up our stuff.  Then, he'll travel to SC and move us into an apartment.  We hope to have pre-arranged the apartment details by early this week so that whole thing will be as smooth as possible.
We also will be buying a second car to make the move possible and because it will be necessary to have two cars if we are both working once we're settled.

I will be remaining at my job, as a nanny, until the kids are out of school.  I don't want to leave them nanny-less, especially on such short notice.  So, Simon will be making the move a couple of weeks before me and then I will follow him up there at the end of May; giving the family time to find a summer nanny.

We're so so excited about what our future will hold and we are ready for the adventure of moving somewhere new (neither of us has ever been to SC) and starting a new chapter of our lives.

Thank you to everyone who has had us in their prayers!
South Carolina, here we come!

Friday, May 4, 2012

Harry Potter Wands


For the same birthday party as the invitations from my last post, I also made some Harry Potter wands.  I really had a lot of fun making them because I learned some fun new ideas that I think I could use on other projects later.  

While I was looking for ideas for the invitations, I stumbled across a blog where rolled up paper filled with hot glue was used to form the wands and then they were decorated with these neat looking designs and colors.  I didn't really like the paper/hot glue version but I definitely stole the design method from This Blog -"YourLifeUncommon"

Supplies:

Paints
Dowel Rods
(We bought 12 individual ones but at Lowe's you can buy long ones and cut them)
Hot glue and glue gun
Paint brush


I decided to use the same colors they used in the tutorial since I was happy with all of their shown end-results.  
The metallic paints were almost twice as expensive as the normal colors at $1.50 a bottle, but I am really glad I decided to make the splurge because they really changed the look and made them fun! 

After some trial and error, I came up with a system that created what I was looking for even though it is a different system than the blog I was following used.  I wanted a brighter and more vibrant scheme rather than the earth tones.  I thought that would appeal more to the kids for whom I was making them. 

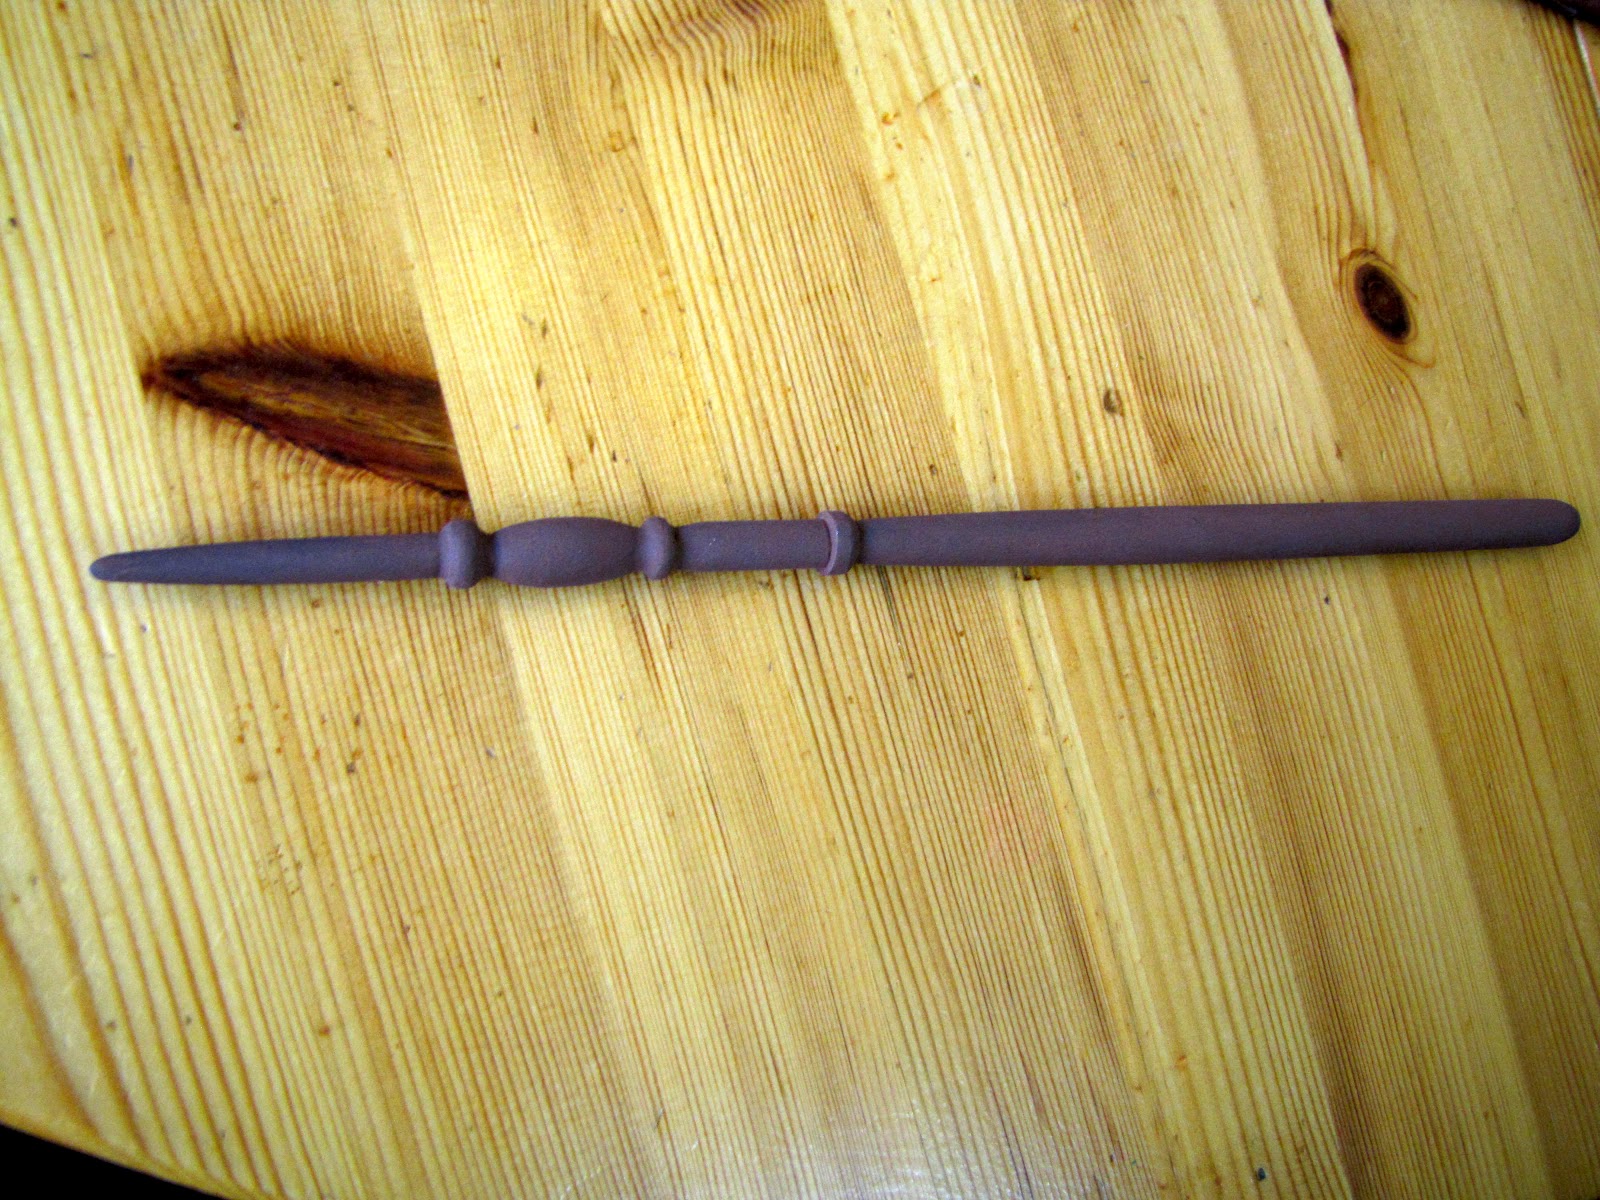
 Okay SO, step one is to sand down the dowel rods in a tapered fashion.  Simon did an awesome job turning the cylindrical, bland rods into nice rounded wands!  If it  hadn't  been for him, I probably would have had to go with the paper and hot glue version.  (Below is the more carved and detailed wand that Simon made for the birthday boy.  The others were just tapered.)


Step two is to paint each wand a base color.  I chose to use brown, silver, gold and black bases.  I wanted them each to be unique if possible.   (brown above) 


Step three is to create three-dimensional designs using the hot glue gun after the paint has completely dried.  I chose to go with just simple swirls and an occasional dot just to keep it easier.  I had a low-temp glue gun which prevented the glue from running.  I think that was helpful and would be the best glue gun choice.

After letting the glue completely harden. Step four is to decide which accent color you will be using.  You mix a small amount of your accent color with the base color and then roughly coat the wand and the glue.  Here, I used black as the accent color.  (If you use black, you only need a TINY amount to  achieve the subtle mixture).  I experimented with just about all of the combinations.  My favorites were when I used gold as an accent color for the brown base wands.  But in the end I liked how all of the color combos looked.  
I know it's hard to see the color differentiation in this picture but if you look around the swirls the color is showing up best.  The lighting wasn't very good.


Okay, Step five.  With the chosen accent color, carefully paint over the raised swirls and designs.

  
Step sixuse a highlight color (usually either the metallic gold or silver) to highlight around the swirls.  


Here on this brown and gold wand it is easier to see how the metallic colors accent the swirls for a neat end effect.

Here is a wand with silver as base, black as accent and then I used green rather than a metallic color to enhance the swirls.  Since the base was metallic I thought a brighter color would achieve the same effect.  The kids loved the silver and gold wands the best where as Simon and I liked the brown and black ones the best.  


Well, here they are.  They all ended up looking pretty different and each slight color difference really gave a new look.  What made it so fun was that it wasn't an exact science.  I was messy and random and I just tried things out and, if it didn't work, added another color and painted over it.  There was a lot of room for figuring out as I went which made it a fun project rather than a perfectionistic/stressful project.  

If I did them again:
I would be more liberal with the layering.  I was afraid on the first few to really do a lot of color piling and as I went i got more confident and brushed the accent color all the way down to the tip or used the highlight color heavily.  They had a lot more character when I was less reserved and more creative.  

The kids had a great time picking the wand they thought would "choose them" after they were sorted into their houses.  They were running around after the party casting spells on each other.  It was fun to watch them so excited about it all.  


Saturday, April 21, 2012

Harry Potter Birthday Invitations


Right now I am nannying for a family with three Kids.  Brennan, The 8 year old boy, wanted to have a Harry Potter birthday party and since I had seen some cute invitations on blogs from various creative party throwers, I offered to make some personalized invitations for him.  I got this idea and the envelope template from  Just another day in Paradise.  After looking at a lot of variations this is the on I decided to tackle.  

Materials:
Cream colored cardstock
Brown ink pad
double sided tape
Sealing wax- red
Seal- (I used one with an "H" for Hogwarts)
lighter (butane works best)


 This is the envelope template that I used but I think, depending on the size you want, any would be fine.  This template ends up being 4.5 x 5.5 and it is difficult to find an envelope to fit it in if you want to double envelope it for mailing.  


 Printing the name and address on every envelope was difficult because it took a lot of trial and error with the spacing.  But it was worth it in the end I think.  I like it better than having them written on there.  I downloaded the "Lumos" font.  It ONLY works on windows and you need one of the newer versions of  Microsoft Word in order to have the rotating text box feature.  
Make sure you print the name to where it will be right side up once the envelope is folded!!


 I traced the template and cut out the envelope...

 .. and then used the ink to make it look a little worn or antique-ish.  On clearance at Michael's (where I bought all of the craft supplies) I found an "ink smudger" which ended up being REALLY useful because i couldn't get it to really look right with just my fingers but it isn't necessary and a cloth probably would have done the same job-  It was just super cheap so I went ahead and got that.  
I didn't go too crazy with the ink, I just used it to give a little character.  


 Fold up the edges based on the template.  Once it was folded I ran the smudger with lots of ink across the edges and I was really happy with the effect that gave it.
  
 Ta-Da


Then for the letter....


 I found a Hogwarts "crest" online that I thought was cool and used it as the back ground to the letter.  I faded it a lot so it looked more like a watermark but I raised it to the top of the page to accommodate for the shortness of the letter.    (The normal watermark placement looked weird)


 Here is the wording
I decided to smear some ink on the edges of the letter too.  
Now, into the envelopes they go.  

Here is a picture of one of the sealing wax sticks (the package came with 4), the seal, and lighter.  The butane lighter really works well because the control you have with the flame really makes the whole thing go quickly! 
 I had never used sealing wax so it was a bit of an adventure.  Please PRACTICE on an extra envelope or spare scrap of paper and NOT on one of the labored-over completed envelopes.


I watched a video on youtube to figure out how to begin going about it.  Once I got the hang of it the seals went pretty quickly.  


Final Product:

Overall I was pretty happy with how they turned out.  I was really impressed by how cheap they were to make.  The sealing wax and seal were definitely the most expensive part ($5 for the wax and $5 for the seal).  Overall I spend $16 and could have probably made 20 invitations with the supplies.  I only needed 10 but it wouldn't have been any more expensive to make double.  They are probably a little more expensive that a themed store bought invitations but I think this sets an exciting vibe and gets the kids excited about what magic they might discover at the party

Friday, April 6, 2012

Great News!!!!!!!

After months of waiting, Simon's Employment Authorization Card has ARRIVED!!!!


We were expecting it back at the end of January and by February we were getting frustrated.  Then, last Sunday, in an inconspicuous envelope we opened it and were thrilled!!!

[Disclaimer :  Simon was not allowed to smile in his picture.  This was taken at his biometrics (fingerprinting) appointment back in November]

So, it may be self explanatory, but just to clarify, this is not a green card.  This is just a beginning and vital step to the green card process.  This allows Simon to get a job without strings attached while his green card is being processed.  
The next steps are to job hunt, make connections and proceed as a normal recent college graduate would to find a job- no more waiting!

Green Card update:  We just found out that we will, in early May, have our personal interview with immigration services. So that process is moving forward too.  As far as we know, the interview is the final factor in their decision to accept or deny the request for a green card so it's a pretty big deal and hopefully we know each other well enough to answer questions like "what kind of deodorant does your spouse wear?" and other more serious ones.  HA
So, that's the latest exciting news for us.  We're really happy and we have appreciated all of the prayers towards a speedy processing.   

Wednesday, March 21, 2012

Tulips and Bath Houses

Last week we went on a vacation to visit my parents in Little Rock and, after that, friends in Searcy.  A last minute change allowed us two more days with my parents, which I (Sarah) was excited about, and turned out to be a lot of fun.  
My parents both took off work for several of the days and my mom decided it would be fun for us to take a day trip out of Little Rock.  Hot Springs was the city of choice.  I had never been to Hot Springs and didn't know what there really was to do there so we did some research online and came up with some fun options. 


The hot springs in Hot Springs (ha) make the city famous for it's bath houses.  Only one of them remains a true bath house; many of the others have been converted to spas, visitor centers, or museums.  Above is  Simon playing in the shower during our self tour of one such bath house.


My mom lounging with me as we wait on Dad and Simon to come back.

The town still has a lot of it's older features like the original hotel or barber shop signs.  I always find little places like that charming and it is fun to remember how things used to be.  This was an old advertisement on the side of what is now a clothing store.  

We ate at a cool little Ecuadorian place called Rolando's for lunch.  It was definitely different than anything we had tried before but everything was delicious.  

One of the things that sparked my mom's interest in Hot Springs was an article she read about a soap store and cupcake store owned by the same people.  All of the soap scents were based off of cupcake flavors.  My mom is a sucker for that kind of stuff and so am I so we wanted to go by there before we left.  

 Bathhouse Soapery & Caldarium was the name of the soap place and they really did have delicious sounding soaps.  I decided on a Cherry Almond soap and my mom got Cotton.  


The Fat Bottomed Girls Cupcake Shoppe was right next door and had some deliciously named cupcakes.  We each got one: Red Velvet Cake, Salted Caramel, Lemon Lavender and Creme Brulee.  After eating until we almost popped at Rolando's, we decided to wait and eat these when we got back to Little Rock.  I had the Lemon Lavender and it was wonderful! Definitely unusual, but yummy!


During our internet search for things to do in Hot Springs, we had come upon Garvin Gardens.  I knew you could have weddings there but I didn't know it was also a place to just wander around and enjoy nature. Lucky for us (or for me) the current exhibit was Tulip Extravaganza! I was super excited because I LOVE flowers and what could be better for a flower lover than a Tulip Extravaganza! I was not at all disappointed. 


One of the Peacocks that greeted us at the Gardens


 Family picture...  we hadn't  intended for it to be funny but when my Dad had to straddle the two rocks I couldn't help but laugh so this is how it turned out.


We got some fish food in the lobby before we headed out but the koi fish didn't want to eat any of our fish food.  I guess they get it all the time so they just stay full.

After about an hour of touring the gardens we FINALLY made it to the tulips! It really was magical with bright tulips as far as you could see.  


 Picture Moment


I took a ridiculous amount of tulip pictures, so these  are just a couple that I thought captured the scene well.  
All of this was just one day of our Little Rock stay but the remaining time was less adventurous.  Mom and I went shopping.  That is something I have definitely missed because Simon is... to say the least... NOT a shopper and even if he was, he couldn't replace shopping with Mom.   
We were able to spend an evening with my grandparents and get caught up on their lives and over all it was just a pleasant and much needed trip.  Thanks for making time for us Mom and Dad!!

 [More on our Searcy Trip to come]    

Sunday, March 11, 2012

From Trash to Treasure

A few weeks ago, I (Simon) found a door at the side of the road that was put out on the street to be thrown away with the trash the next morning.  The reason it even caught my attention was that it had lots of old license plates screwed to it, so I carried it to the garage to remove the plates.  Signs of all sorts have always intrigued me, and I thought it might be cool to use them to decorate a shop or garage later in life (if we ever have one).

 I didn't think to take a picture of the door with the license plates attached to is, but here's a pic of all the plates.

Later that night (I had already put the door back to the street), I showed Sarah the door, and she liked it so much that we decided to keep it to "do something cool with it."  So I carried it back to the garage and started brainstorming ideas to make the door into a table.  

 This is the door.  I scraped all the loose paint chips off from this side.  On the other side (not shown) I scraped and sanded the paint off completely.


I thought about simply putting it on two sawhorses but wanted a more permanent solution.  So, I decided to make it into a real table with an apron and four legs.  But wooden table legs can be pretty expensive, especially cause I wanted turned spindle legs.  I found some at Home Depot for about $9 a piece, but didn't love them, so I went on Craigslist and found this little table for $30 that I picked up the next day.

The table that I bought off of Craigslist

Of course, I wasn't interested in the table itself but in the legs and the rest of the hardware, so I disassembled it into its components.  The next step was rather tedious though: I had to sand off the paint on the legs.  

First it was hunter green.  Then it was black.  I didn't like either of them. 

An hour and a half later after using 60 grit sandpaper.  Still a little rough around the edges but overall pretty good.

That's better.  I used 150 grit sandpaper to make it nice and smooth.  Because I wanted to paint it and not stain it I didn't try and get 100% of the old paint off.  99% was good enough for me.

I bought three 8 foot long pine 1x4's for the apron around the table for about $6 a piece.  I reused the wooden corner brackets from the Craigslist table and started building.

The first corner.  I used wood glue in addition to screws to attach the corner bracket to the apron.
(I apologize for the yellow in some of the picture.  The camera was on a weird setting and I didn't notice) 

Because the whole table is going to look rustic anyway, I wasn't so worried about accuracy; it didn't have to be perfect.  I made a lot of decisions on the fly and made good progress.

Here you can get a good idea of how the table is going to look.  As you can see, I had only sanded off half of the legs at this point.  Sanding was by far the least fun part, but it was necessary and I'm glad I cannibalized the Craigslist table even though it meant more work for me.

As I was saying earlier, I made a lot of decisions as I was building.  One of which was the idea to have a drawer in the front, and suddenly I wasn't making a table anymore.  I was making a desk.  


I reused the old aprons of the Craigslist table to stiffen up the structure of the desk.  As you can see, we're down to only one black leg.  


Taking out the apron section in the front to make room for the drawer weakened the structure so I had to reinforce it


And this is where the drawer is going to go


And instead of one large drawer, I now decided to have two smaller ones.  I added some 1x3's parallel to the front to increase stiffness of the table base.  The little black piece of 1x3 in the front will separate the two drawers and will be screwed into the tabletop (door) for increased stability


I used pine 1x2's to make rails or "tracks" for the drawers


This is where the left drawer is going to go

I picked up two 6 foot long pine 1x3's for the drawers that cost me about $5 a piece.  For the bottom I bought a 2'x4' sheet of 1/4" plywood which was $7.

First drawer made of pine 1x3's and screwed together using pocket holes made with my trusty Kreg Jig


1/4" plywood for the bottom makes the drawer (almost) complete


Now I just needed to attach a section of 1x4 to the front of the drawer to make it blend in with the apron of the desk.  Drawer #1 is complete


This is where I tested out the drawer for the first time.  Will it fit?


Looks pretty good to me


The table base was then screwed to the door using pocket holes.  All legs are sanded and I was ready to flip the desk right side up and put those drawers in


Construction-wise, I'm done!  This is the front of the desk...


…and both drawers work.  I like it.

The construction was complete, but the desk was far from being done.  Sarah and I went to Home Depot to pick out a paint color for the base of the desk.  We chose an olive green called "Amazon Jungle" by Behr for $14 for a quart.  In addition we picked up a quart of water based polycrylic from Minwax for $18.

 After one coat of paint.  I didn't paint the "tracks" for the drawers on purpose, cause I wanted them to be smooth so the drawers could easily be moved in and out.


After two coats of paint


These are the two fronts of the drawers.  In order to paint all five sides needed, I screwed screws into the backside to make "legs"


Drawer fronts and legs after two coats of paint


Detail view of a leg.  Painting the legs was tedious because of their shape.


This is after two coats of polycrylic


Here you can see the difference between bare paint and polycrylic finish.  The spindle part of the leg has two coats of polycrylic on it and the "square" top of the leg only has two coats of paint.  Sarah and I both prefer a matte finish and the polycrylic we chose was the least shiny.  It was called "Clear Satin."

It took me a couple of days before I painted the top of the legs.  While everything had a chance to fully cure, Sarah and I went to Anthropologie to buy a couple of knobs for the drawers.  It took us quite some time to decide on a knob we liked, but this is the one we chose.  They were quite pricey ($8/knob), but we both really like it and think it works really well on this desk.


The knob we chose for the drawers


Unfortunately I had to sand off the top of the drawer front, because with the additional paint and finish I applied, it was too tall to fit underneath the table top.  It doesn't look bad, but I liked it better with the drawer front being green on the top. Oh, well…


Once everything had at least 24 hours to fully cure, I assembled everything and (with Sarah's help) flipped the desk right side up, put the drawers in…and was done.


The desk


Showing the two drawers

When I painted the desk it was super windy and it just so happened that the lawn crew came that day, so there was quite a bit of dust and things in the air that stuck to the freshly painted desk.  At first I was annoyed, but then I just embraced that fact that the surface wouldn't be super smooth.   Again: The desk is pretty rustic so it doesn't have to be perfect.  


Imperfections under the paint


Eventually we'd like to buy a large piece of glass to put over the entire surface of the desk to have a smooth surface.  We'll wait till we have a place to put the desk as the glass might just break in the moving process.  We also might paint the top of the door a more uniform white, but for now, we're done with it and (sadly) it can be put in storage until we have our own place again.